Some time ago I found this package of twelve babies for a dollar at a - what else - Dollar Store.
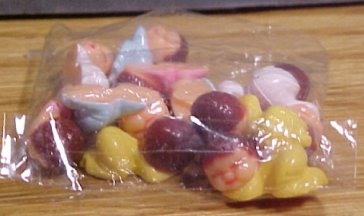
Since I was planning a Fairyland setting, it seemed worthwhile to fiddle with them so that I could have some additional baby fairies to go along with my "prettier" ones. I figured they could be in the background if they worked out.

I didn't like the painted hair so decided to see how easily it would scrape off. The baby with the specks on its head is the result of my first attempt at removing the hair by scraping with a craft knife.
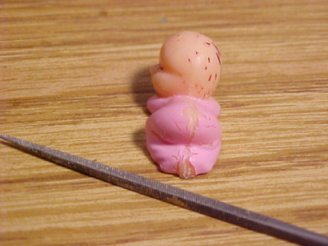
I wanted the baby to be unclothed, so filed a bit of a crease in its little bottom. Ouch!

Here are the first three experiments at unclothing them. The baby at the left is simply painted over; hair shows through, though, so that's not a good solution. The baby on the right is the one whose hair I scraped off. Repainted; he's passable.
The baby in front I rubbed with Goof Off, which removed both the paint on the hair and the gown, as well as most of the grooves in the hair. I like its look best. However, the remover left the doll sticky, since it literally melted away the top layer, so you have to work rapidly with it and kind of smooth as you go. After it dried, however, it had much more of the look I was aiming for. Somehow, its head doesn't look quite so big now, either.

While it was sticky I also smoothed a bit at the sides of the eyes, so they wouldn't have quite such an exaggerated slant.
I also noticed the babies had awfully big noses, so thought I'd try a little plastic surgery on this one with the craft knife. I did this while using the Goof Off, which allowed for some smoothing to make the cuts blend in.
While I was working with these dollar store babies, my eye feel on a strange fiber and wire tree at the end of my work table (I had purchased several to use in Halloween scenes). And what popped into my mind then was "Rock-A-Bye Baby, In the Tree Top ...."
Aha! Baby Fairies lulled to sleep in a treetop nursery!
My next step was painting the tree with a mixture of brown paint and glue. Then I prepared soft little beds for the fairy babies by molding lichen and model railroad moss into little nest-like mounds. These were glued to the tips of the tree's outer limbs.
Here is my Rock-A-Bye Fairy Napping Tree in progress.
I have a feeling these may become a part of a later Fairyland Playground setting. Those interesting pods could become little boats or swings or rocking chairs, maybe.
The babies were dressed in various silk flower petal hats and tiny skirts or bodices. The last thing I did was give them some hair to match their bonnets - although it isn't shown here.
Not bad, if you don't look too closely. On the other hand, new babies of any species aren't particularly beautiful right away, are they?
And these fairy babies wound up being center stage, or center tree, so to speak, in their own little setting - the Fairy Treetop Nursery.


