Holly, of Grandma Holly's house, wrote to THECAMP online miniatures list about too much showing - like loose threads - when she takes close-up photos. "How can I adjust for this?" she asked. "I have tried taking a less close picture, but when I crop, those pesky details show up anyway. Even a tiny thread can look very nasty when blown up in great detail."
I started to write "How I do it" for Holly, but found it difficult to explain with just words, which is why I wound up using some of my photos and doing this full-blown tutorial instead.
I am not a pro with the camera and certainly not with graphics; everything I have learned has basically been trial and error. Fortunately I have a Sony Mavica digital camera, and it is easy to operate. When I started my website, however, I learned that I also needed to be able to manipulate my photos AFTER they were taken, and that was harder and I was intimidated.
My husband loves to work with maps, and in the process of mapping mountain biking trails in Franklin Mountains State Park (which by the way is the largest state park completely within a city limits) he taught himself how to use the old Paint program that came with our original PC. He then taught me, beginning with working to clean up photos, one pixel at a time, and has continued to teach me new techniques as he happens on them.
We got PaintShopPro about three years ago, and although we eventually acquired a later version, we found it very stressful to use because it seemed unnecessarily more complicated. So we happily regressed to our old PSP 6, where we both feel comfortable.
And if you don't have PSP, don't worry; the same procedures can probably be done with at least the minimal Paint program that comes with your operating system.
Okay; here we go.

This is how it looks when I open PSP 6.

This is the top tool bar when an image (a page) has been opened. You will need to familiarize yourself with yours.

This is the left tool bar, and we will be working with its symbols.
 This is the Crop tool. It is used to get rid of what we don't want, leaving just the part we have selected.
However, much of the time when I am just cleaning up photos , I use the Select tool  or the Lasso
 (for irregular shapes) to select what I want to get rid of, then hit Delete or use the Cut key combination (Control X) or go to the EDIT drop down menu to Cut.
OR, I select what I want to keep, and then Cut and Paste it into a new image (either Control E or go to EDIT, etc.) You can see this process further on in this tutorial.
CLEANING UP A PHOTO
METHOD ONE
I took pictures of all the miniature furniture pieces I purchased from Bombay Furniture Company (no longer available from them, unfortunately) so that I would have a photo inventory when I wanted to use any of them in a project. Because these pictures were not intended for anyone else, I didn't try to set up a nice-looking background. I am using one of those photos of a serving cart to illustrate how I clean up a photo to get rid of things I don't want in it.

The original photo is too big, so the first thing I need to do is resize it. I go to Image in the top tool bar, then to Resize, and resize it to 80%.
By the way, when you are working with a photo, save your original and work with copies. That way, if you mess up - and you will - nothing is permanently affected. To make a copy, hit Shift D.
Also, I have learned from bitter experience to name the photo and save it FROM THE BEGINNING. And, as you work, save along the way. It's terrible to put in so much effort and then lose it all. Ask me how I know this ....

Okay; resizing has made the photo a bit more manageable. Perhaps I should crop it more; get rid of some of that background stuff (some Dept. 56 teddies!) that shows on the left side.
To do that , use the Select tool to choose only what you want to keep.

and then go to Image, Crop to Selection, which leaves you only the selected area:

We have removed more extraneous material, but now look at the numbers showing on that darn card in the background!
I could use the Eraser tool , but I don't really want to go to all that trouble in this instance. So, how to get rid of just the numbers?
One way to do it is to copy a section in the "clean" area and literally paste it over the numbers. I often use this method when the background is not one solid color.

Sorry for the distortion in color, etc., showing here. With our old Paint program, the processes and tools showed in the image when I hit Print Screen, but for some reason they don't with PSP (or I just don't know how to make them show), so in order to illustrate some of these steps I am having to photograph the monitor screen for closeups and the light is coming in wrong, darn it. (*More on this process at Addendum at bottom of tutorial)
Anyway, you can see that I have used the Lasso tool to select a piece of the background between the numbers.

and copied and pasted it so that part of the top number has been covered.

Here you see it more realistically from a distance.

Pasted again...
And again, completely covering the top number.

But notice the shadow edge looks a bit stark? Well .....
But before we deal with that, let's go ahead and copy and paste over the lower number. Since there is now more plain space available, I can Lasso a larger expanse and copy and paste more quickly.

All righty; now the numbers are gone. I could just go on and leave the shadowed area as is. However, let's try another method to make its sharp edge less noticeable.
First, I make the Eye Dropper tool  active, and then click in the shadowed area.

Sorry again for the distortion in color. Anyway, I select a slightly darker area in the shadow for my paint color.

Then I choose the Spray Can image  and sort of swish along the edges of the shadow to soften it.

Yup; that softened it. And even though it would've been preferable if I had staged the cart photo better in the first place, at least now the most egregious distractions, those numbers, are removed.
But there is another problem. Notice how the light when I took the picture was shining too much on the cart's top front edge, and making it look rough, as well? I need to take care of that, because in reality the cart doesn't look that bad; it's my photography that makes it look that way!
So here is where I use the Lasso again.

I am going to use it to select an area to the RIGHT of the shine, then Copy and Paste over one section of the shine, working from right to left toward the corner.
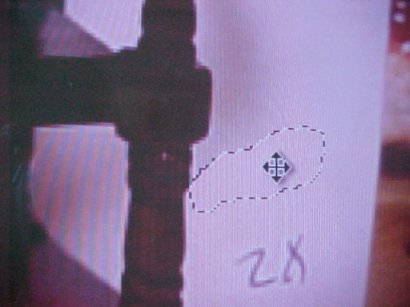
This large image shows a "nice" section which I have selected using the Lasso tool. Stay as close as you can when you are copying; get too far away and there will be too much variation in color shading.
This is the Move symbol you are seeing here with the camera, but rather than move what I have selected, I want to Copy, and then Paste the copied area just to the left where the shine is.

The section has been pasted, and the copying and pasting will continue until the shine is covered.

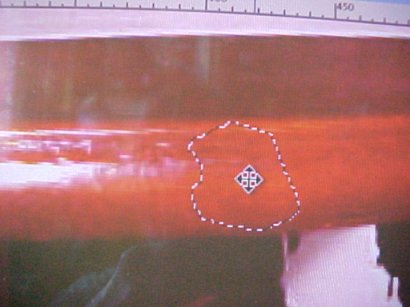
Here is a longer view showing where I have copied and pasted the first time. Looking better, so I will continue.

What I noticed here was that I had copied a wee bit of shine and have been repeating it, so I have gone back to the previously covered area and selected a portion that does not have the shine.

Okay; not bad so far.

I have decided to copy a longer middle section and paste it, then go back and copy the edge line.
Aha! I finally captured the lasso again; just remembered that it shows up when the cursor is OUTSIDE the selected area and the Move icon shows up when the cursor is INSIDE the selected area. Guess I am a slow learner, or at least a slow rememberer. lol

Here I have pasted this longer section again.
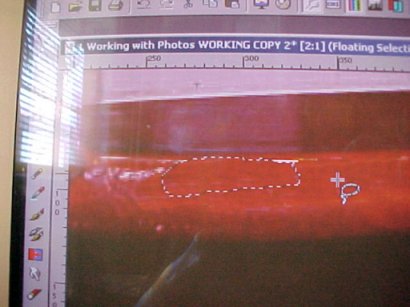
Remember when I said earlier that it is important to name your photos? Look back at this photo; at the top you can see the name I have given this one.

I put a 1 in front so that all the photos in this particular tutorial will show up first in the folder. "Working with Photos" is what I named the tutorial, and all photos relating to this project will begin with this name. WORKING COPY 2 shows it is the second working copy I have used. When all the photos begin the same, it sure makes it easier to track one down later.
This looks a lot more complicated than it actually is because I have already saved lots of photos and when I name a new one I can just click on a previously named one in the folder, it shows up in the window and then I can add a letter or two to change it to the new name.

Here's an example of a file being named where I just added on the words WORKING COPY to make a new one.

Okay, back to the cart to finish up the copying and pasting to the corner.

I could leave it at this, but I think I will use the Eyedropper to select a slightly darker tone, then use the Spray Can to soften the shadowed edge.

Got the color, so it's time to spray.

Not a big deal, but it helps.

Backing off and viewing the cart, I think it looks much better, don't you? And it looks much more like it does in real life.
Here's the Before and After:
And that's one method of cleaning up a picture. You can cover a multitude of sins by just cutting and pasting!
METHOD TWO:
ERASING BACKGROUNDS
Here is another slightly altered view of the cart, but the same problems are evident.

This time I will concentrate on getting rid of the distracting background (we already know we can clean up the too shiny or too rough areas as we did with Method One).
First, we will use the Lasso tool to select and delete as much as we can of what we DON'T WANT visible in the photo.

You can use the Zoom tool  to zoom in while you work so that it's easier to see what you are doing, pixel by pixel (those little squares that you notice when things are greatly enlarged). With PSP, I can just scroll with the mouse and the image enlarges, too.
Notice that this file hadn't been named yet when I took the picture? The number showing is the number of the original photo saved unchanged. So, I decided I better name my working copy, before I messed up the original and/or lost all my work!

Notice I have cleaned up my photo a great deal by just selecting and deleting what I don't want. Let me try that again.

More has been removed on the right side, but you will notice there are still some bits showing out there in the white. Let me get rid of them.

Well, good grief! I still missed one line over there in the white space on the right, but it can be removed with the eraser or by using the Select tool to enclose it, then hitting Delete.
At this point, if we chose to, we could leave the floor visible and just use the Eraser to clean up the edges. Let's try that.
By the way, don't forget to use the Zoom to enlarge your photo so that it's easier to see what you are doing as you work with the Eraser.

Here I have gone down the right side with the eraser, like this,

but have a bit of an uneven edge at the floor. I will clean that up by using Select to enclose what I don't want and hitting Delete.

See? The line is now straight on the right. Now let's try the top and the left side of the cart with the eraser.

I have used the Eraser along the top. It looks a bit ragged at the left corner, but I can go back over it if I choose to. Notice that very dark shadow just under the cart top? It's important when you are erasing that you step back and survey your work carefully when you have shadows like this. Sometimes it's hard to tell what's shadow and what's cart, and often your photo looks better when you leave the shadows. However, I have decided that I will like it better without that dark shadow, so I am going to erase it.

I could leave it like this, or I could go ahead and erase everything around it if I wanted to do the work and it was really important. Sometimes it matters very much; sometimes it doesn't. Right now it doesn't matter that much to me because I just took this photo for my inventory of Bombay furniture pieces.
Well, there you are.
This little tutorial does not presume to be anything other than what it is, a means for me to explain how I do things to someone who is asking the same questions I asked. Obviously, this isn't the only way or certainly even the best way. There are probably far more efficient methods, with excellent lessons, to do this sort of clean-up of a photo; all one has to do is search with Google. But one who uses these techniques can clean up pictures quite respectably.
REMEMBER:
Don't use your originals;
name your working copy picture right away,
and save, save, save frequently so that you don't lose it all.
Good luck, and be sure to breathe while you work. lol
,,,
*ADDENDUM TO METHOD ONE: After I created this tutorial and posted it to my miniatures lists, Charlene from Canberra wrote me. In regard to my inability to show the actual tool in use, which resulted in those poor quality photographs of the screen, she said:
"Hold shift, tap print screen, then 'paste as new image' from the menu or Control-V. I have PSP5 and it works. I don't know why you have to hold the shift key these days but it works when you do. I think in the old days we used to call this a "screen dump"...
This works.

Here is a picture of the Select tool in use (although the tool symbol itself still does not show). So, had I known this technique before, I could've saved myself a lot of unnecessary work and aggravation when I was trying to photograph the screen!
All I would have needed to do was paste the tool symbol atop the photo to illustrate my point and saved you from viewing the dreadful color distortion in the tutorial above.
So, in future, if I want to capture a process in use, I will:
Hold down Shift;
Tap Print Screen;
Paste as New Image
I have other things to do and so am not going to rewrite this tutorial, but will just let this illustrate my learning curve. Hopefully it will help others who may be as insecure as I have been with graphics. We old dogs can learn new tricks!
Thanks, Charlene!
NEXT: >>


